
So today while working on my new product range I realised that I ran out of sew-in labels. I make my own labels so I thought why not make a tutorial out of it! I know that there are a few out there but I have to say most of them leave a lot of gray area to be worked out. After many trial and errors I have come to understand this technique that I use for all my labels even my care labels, whether working with cotton or satin.
You’re going to need:
- t-shirt transfer paper
- an iron
- fabric
- ruler
- rotary cutter or scissors
- grease proof/ non-stick parchment paper
- clear nail varnish/polish
Before we get into the physical aspects of the project we will start with the digital side. In this tute I will be assuming that those of you reading do not have software such as Photoshop so we will be using Microsoft Word to set up our labels to print.
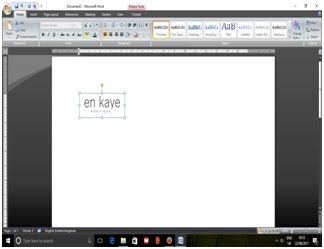
Open up Word and select your logo:
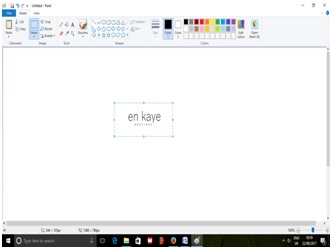
Be sure that your logo has enough space on all sides so that you have enough cutting space. If you need to resize your logo you can do so in Paint by cropping around the photo further away like this:
Next you will need to outline you logo in word so that you have a cutting line like so
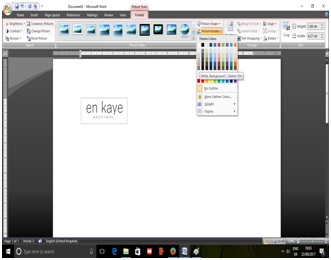
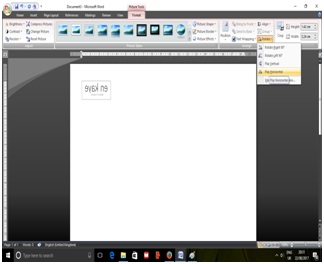
I chose a light grey so that it does not come out too dark but dark enough to see the lines. Be sure to set your document to narrow margin (page layout -> margins -> narrow). You will have to manually flip your logo before you copy and paste it. To do this double tap on your image and the picture tool tab will come up select rotate and flip horizontal like so:
At this point I print out a sample to make sure this is the correct size that I want and I do urge you to do the same. It makes no sense that you waste your transfer paper on a sizing you do not want. Afterwards you will need to select your logo and copy it (Ctrl + c) and paste it (Ctrl+ v) until the entire sheet is full like so:
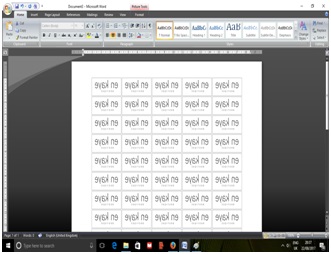
With this set up I get 85 labels with my size being 1.42 cm in height and 3.24 cm in length. You may not want yours that small but these guys are perfect for me. And by narrowing the margins you get extra space for more labels!
Set up your transfer paper next by following the settings on your pack and print!
Here’s what your printed page should resemble:

what I do at this point is to split my sheet in half and proceed to cut columns out. it makes it easier to iron and peel off too without any hassle.


I also press the cloth I’ll be making my labels from before I start the iron on process.


With your iron on its hottest settings, press your transfer paper to your fabric without steam on a flat surface such as a table, with a cloth under. Do not use excessive force as you are likely to misaligned and smudge your work. just gently press for 30 seconds then allow to cool for 30 seconds before you remove the back or else it pulls away from the surface of the cloth.


I then cut my fabric with my labels on it off and press for 30 seconds with the grease proof paper. Most of these transfer paper packages include at least 1 but I tend to use Bacofoil as I get lovely results from it.


Lastly I cut each label out and seal the edges with clear nail varnish but you could always use any fray stopper of your choice. because I am using poly cotton which does fray considerably I do have to seal off the edges. I suppose if you were to use something like jersey or so you could forgo this step


Depending on the sizes of your labels you could be saving yourself a fortune and you can do it yourself. Having the right size for the right products matter and especially when you are first starting out buying labels are really expensive. I do hope this helps a lot and let me know in the comments how you got through with this tute!

